BUILDING YOUR FIRST R/C
SELECTING THE R/C AIRPLANE

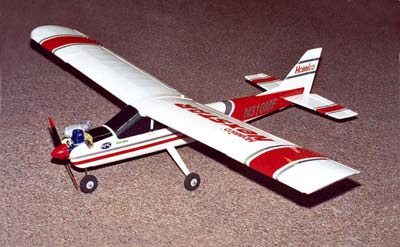
So you want the ultimate experience of building and flying your own R/C plane for the first time? This article is strictly meant for the first time flyer. It is very important to select the proper model that is going to be easy to build and fly. There are many trainers available that offer real aircraft performance. My personal selection for the best trainer is the NexSTAR by Hobbico. Fairly large with a 68 3/4" wingspan, using a .46 to .50 two stroke engine.

Your Hobbico NexSTAR should not be considered a toy, but rather a sophisticated, working model that functions very much like a full size airplane. Because of it's performance capabilities, the NexSTAR, if not assembled and operated properly could possibly cause injury to yourself or spectators and damage to property.

SAFETY PRECAUTIONS
Your R/C radio system must be in first class condition. Installation of components ( fuel tank, wheels, servos, etc.) must be done properly. You must make sure that all R/C components are installed so that the model operates on the ground as well as in the air. You must check your model before each flight to insure that all equipment is operating properly. Be sure to check clevises or other connections often and replace them if they
show any signs of wear. If you are not an experienced pilot or have not flown this type of model before you should get the assistance of an experienced pilot from your R/C club for your first flights.
KIT INSPECTION

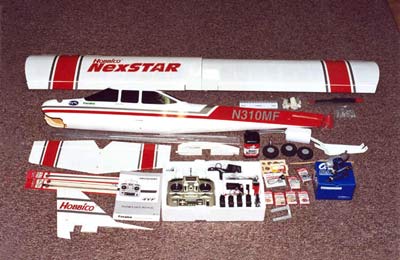
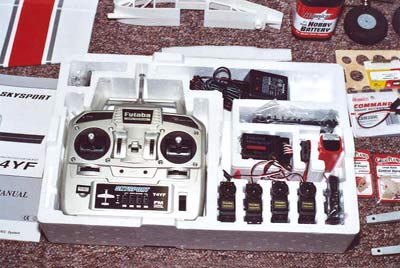
Before starting to build your plane take an inventory of all parts in the kit to make sure it is complete.

Examine the kit
WING MOUNTING SYSTEM
The wings of most trainers are mounted using rubber bands which allow flexibility in case of a crash or hard landing. They work well but are unsightly. The PIVOTFLEX WING MOUNTING SYSTEM combines the looks of a bolt-on with the flexibility of rubber bands. It allows the wing to move under sudden conditions and will release the wing from the plane in case of a crash- causing less damage.

The Hobbico system uses a three line fuel system to simplify fueling and de-fueling.

The NexSTAR incorporates three systems that are very important. The centercore wing rib is a nylon part that is preinstalled into one of the wing halves. It aligns the two wing halves; it is a mount for the aileron servo; the wing dowel holds the wing in place and aligns the bolt to the wing mounting system. This makes joining the wing halves to the fuselage very easy.

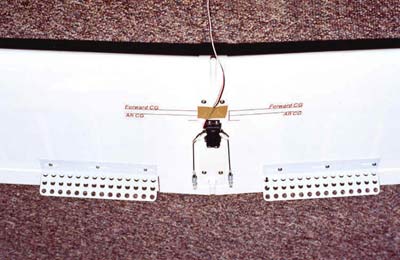
There are extensions installed at the leading edge near the wing tips. These Spincontrol Airfoil Extensions were developed by NASA to help light planes prevent stalls and spins during landing. They slow down the airplane, increase stall resistance and prevent it from spinning. After you become proficient as a pilot you can remove them for better aerobatic performance.
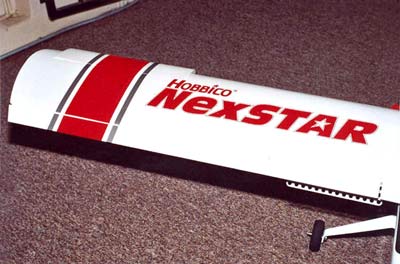
Spincontrol airfoil extensions prevent stalls and spins
The speedbrakes training flaps were designed to allow your NexSTAR to fly slower, reduce top speed, and shorten the landing approach. Long land approaches are not needed. The flaps can also be removed. Installing the motor, landing gear, elevator and rudder pushrods, and tail surfaces should not present a problem.

C/G markings, aileron servo, speedbrake flaps

FLYING
Be aware of your proximity to other R/C club sites. If there is an R/C site within six miles of where you are flying, and if you are operating on the same frequency at the same time as someone else, there is a strong possibility that one or both models will crash due to radio interference. There is great potential for an out of control model to cause property damage or personal injury. You are urged to fly at an R/C club site where frequency control is in effect so you can be assured you will be the only one flying on your channel.
CAUTION !!
- Do not fly near other R/C flying fields
- near people on the ground, or objects in the air
- near homes, schools, hospitals, or any place where there are a lot of people
- near high tension lines, high structures, or communication facilities
WHAT R/C SET SHOULD YOU USE?
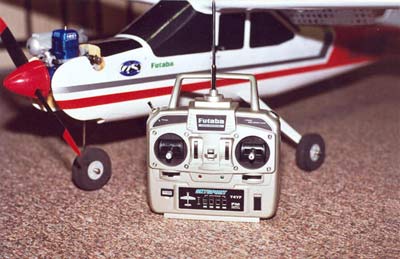
There are many makes of excellent radio sets. Since this is a first time trainer, the FUTABA FM 4 channel T4YF Digital Proportional R/C system is quite adequate. Always extend the antenna to its full length. Check that the transmitter antenna is not loose. If it comes off during use control will be lost and the model will crash. Always test the set before use. Any abnormality in your set or the model itself will cause a crash. Before starting the engine, check that the direction of operation of each servo matches the operation of its control stick. If a servo does not move in the proper direction, or operation is abnormal, do not fly the plane.

When turning on the power switch, after setting the transmitter throttle lever to maximum slow: turn on the transmitter power switch. Then turn on the receiver power switch. After stopping the engine, turn off the receiver power switch, and then turn off the transmitter power switch. If the power switch is turned off in the opposite order, the engine may go to full throttle unexpectedly and cause an injury.
Futaba R/C set

CHARGING NI-CD BATTERIES
Always charge the batteries before each flight. If the battery goes dead during flight, the plane may crash. When not flying the model, store the R/C set with the NI-CD battery in the discharged state. Recharge before the next flight.
INSTALLATION OF SERVOS
Your R/C set comes with the transmitter, receiver, four servos, NI-CD battery with charger, other connections. Install the elevator, rudder and throttle servos in the fuselage servo tray. Wrap the receiver and the battery with foam and install them on the radio tray. Mount the tray in the fuselage. Next install a charge jack so you can charge the batteries without removing the wing. Mount all servos with rubber shock mounts to solve the vibration problem. Mount the aileron servo on the underside of the wing. CG lines are marked on the underside of the wing. Make certain your model balances perfectly to the markings. You may need to add weight to the nose or tail.

Before making any adjustments, set all servo reverser switches on the front of the transmitter to the lower (nor) position. Turn on the transmitter and receiver power switches and make the following adjustments:

- Check the direction of operation of each servo. If a servo operates in the wrong direction, switch the servo reverser.
- Check the aileron, elevator, and rudder neutral adjustment and left-right (up-down) throw.
- Check the engine throttle (speed adjustment) linkage. Change the servo horn installation position and hole position so that the throttle is opened fully when the throttle stick is set to high (forward) and closed fully when the throttle stick and trim are set for maximum slow ( backward and lower position respectively).
- After all the linkages have been connected, recheck the operating direction, throw, etc.
- Fly the plane and trim each servo.
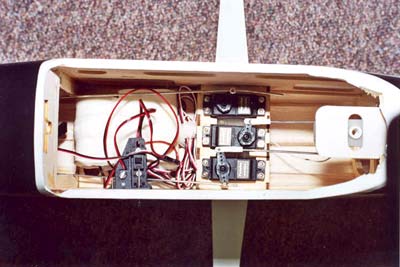

Receiver, battery, servos mounted in fuselage

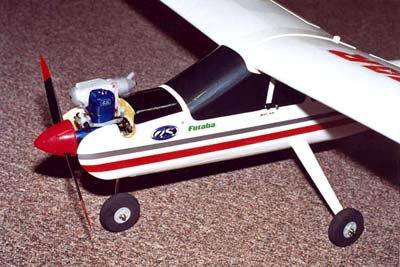
Motor installed

Model complete
FINALLY, THE FIRST FLIGHT

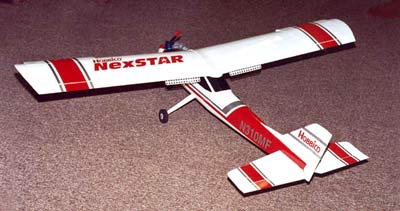
NexSTAR complete

Ready to fly
If you have installed everything properly and double checked all the moving parts, then you are ready for your first flight. Enjoy your project, and start planning more intricate maneuvers. Maybe think about your next model.
Written by WAYLAND MAYO

Introduction - 1/18 Display Models #1 - 1/18 Display Models #2 - 1/18 Display Models #3 - 1/18 Display Models #4 - Various Scale Models #1 - Various Scale Models #2 - Various Scale Models #3 - Control Line Model Airplanes - Building your first R/C

Home Page